The Draw Is Where Derby Strategy Starts
The draw is where Derby strategy starts — weeks before the first trap springs open. While casual punters focus on times, form figures and trainer names, the serious Greyhound Derby bettor begins with a different question: which trap did the dog draw, and what does that mean for how the race unfolds?
The English Greyhound Derby draw is not a random lottery. It is a seeded allocation system governed by GBGB rules, where every dog is classified by its natural racing line — railer, middle tracker or wide seed — and placed into a trap that corresponds to that classification. The process determines which six dogs share a heat, which starting position each occupies, and by extension which runner gets a clear run to the first bend and which faces traffic. In a sport where fractions of a length decide qualification, the draw is not background information. It is the first variable worth analysing.
This matters for betting because the draw directly influences odds. When the draw for each round is published, ante-post markets move immediately. A fancied dog landing trap 6 at Towcester — where the wide bends suit outside runners — might see its price shorten within minutes. A front-runner drawn in trap 4 against two faster breakers on the inside might drift. These price movements are not noise. They are the market repricing probability in real time, and the bettor who understands why has an edge over the one who doesn't.
The Irish Greyhound Derby also uses seeded categories — railers, middles and wides — but the allocation within those categories is random, with no equal-distribution protocol comparable to Rule 80. The English version is more tightly structured. That distinction is significant: it means the English draw carries more analysable patterns, predictable dynamics and — critically — exploitable biases. This guide breaks down how the draw works, what the historical trap bias data shows, and how to convert draw information into smarter bets across every round of the 2026 competition.
The English Derby draw is seeded. Dogs are classified as railers, middles or wides — their natural racing line determines trap placement. This is not a random allocation. It is a rules-based system governed by GBGB Rule 76 and Rule 80, and it directly shapes every heat from the first round to the final.
How the Greyhound Derby Draw Works
Every Derby draw is built on a three-tier classification system. Before a single heat is constructed, the GBGB's racing office reviews the seeding of every entered dog and sorts them into three categories based on their observed racing line: railers run the inside, middle trackers take a central path, and wide seeds prefer the outside. This classification comes from a combination of grading data, trial observations and the professional judgement of racing managers who have watched the dog in competitive action.
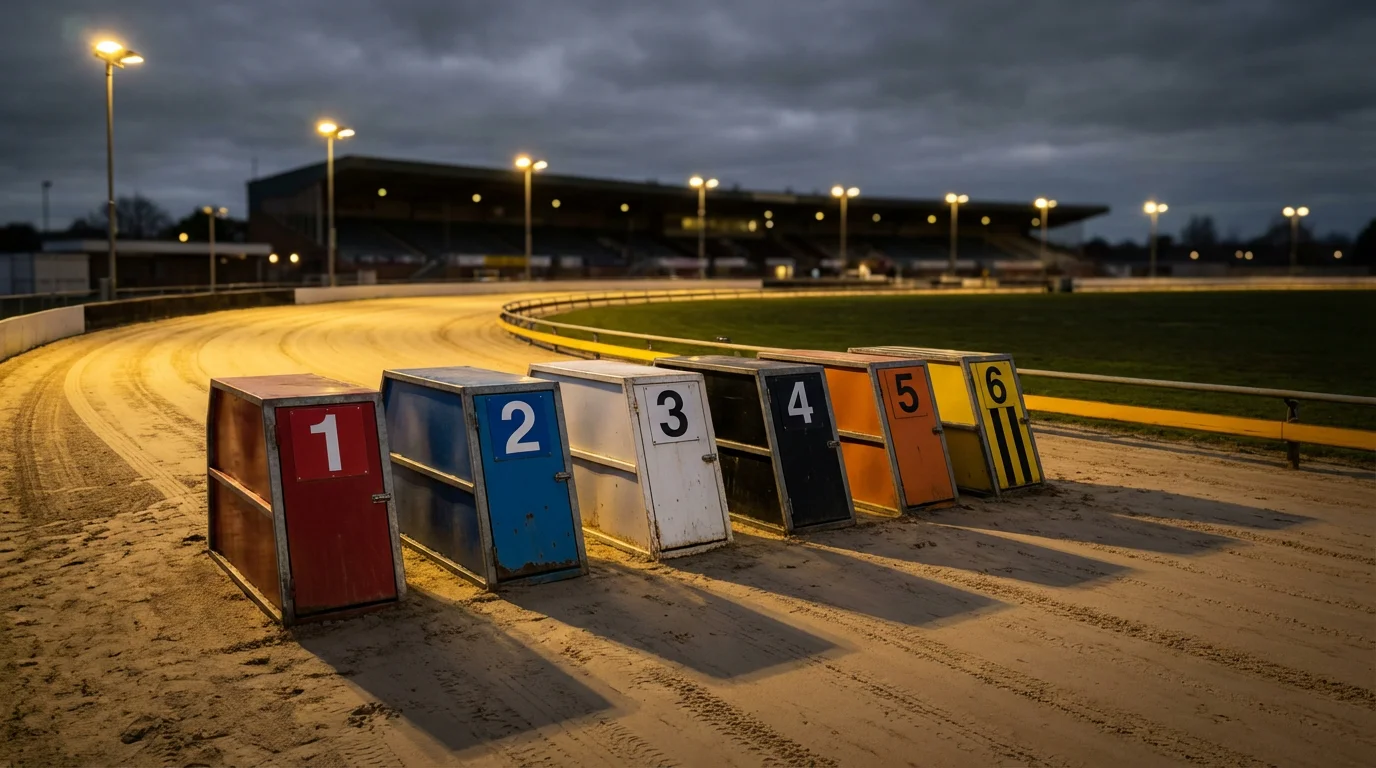
The draw process then works in stages. For each round, the first step is to distribute the railers. These dogs are allocated to the lowest available trap numbers in each heat — traps 1 and 2 in a six-dog race. Next come the middle trackers, drawn into traps 3 and 4. Finally, the wide seeds fill traps 5 and 6. The aim is to place each dog in a position that aligns with its natural running style, reducing the chance of early-race crowding and giving every runner a fair opportunity to reach the first bend on its preferred line.
In practice, the distribution is rarely perfectly even. There are almost always more railers than any other classification — most greyhounds naturally seek the rail — and this creates imbalances. When there are more railers than inside traps across all heats, some must be allocated to middle positions. Similarly, if a round has an unusual number of wide seeds, a few may be placed in traps 4 rather than 5 or 6. These edge cases are governed by specific protocols within the GBGB rules, but they create situations where a dog ends up in a trap that does not match its preferred racing line. For the alert bettor, these mismatches are opportunities.
The system differs from what you might encounter in everyday graded racing. In standard BAGS meetings, the draw is simpler and the classification process less formal. In the Derby — an open race under Rule 80 — the seeding and allocation process is more rigorous because the stakes are higher, the field is larger, and the margin for error in trap assignment has a measurable impact on outcomes.
Railer — a greyhound classified as an inside runner, drawn into the lowest available trap number in its heat. Railers naturally seek the rail on bends and benefit from the shortest path to the first turn.
Seeding Categories and GBGB Rules
Rule 80 changed everything about open-race trap allocation. Under GBGB regulations, Rule 76 covers graded racing — the standard weekly fare at licensed tracks where dogs are grouped by ability and traps are assigned based on seeding. Rule 80, which governs open races including the Derby, introduces a more structured allocation designed to produce balanced heats.
Under Rule 80, the draw for each round proceeds in three separate stages. First, all unseeded runners — dogs classified as railers — are drawn into heats and assigned the lowest available trap numbers. This is not done randomly within the railer pool; the drawing process uses a ballot to distribute railers across heats as evenly as possible. Second, middle-seeded dogs are drawn and placed into the next available traps. Third, wide seeds are drawn and allocated to the remaining outside positions.
The critical detail is the concept of equal distribution. Rule 80 aims to ensure that each heat contains a roughly equal mix of running styles. No heat should end up with four railers and no wide seeds, or three wides and a single railer. When the numbers do not divide cleanly — and they rarely do with 192 entries — the GBGB's racing office uses the ballot system to decide which heats absorb the imbalance. Dogs affected by this overflow are placed in the next nearest trap to their classification, which can produce the mismatches that savvy punters learn to identify and exploit.
From First Round to Final — When Each Draw Happens
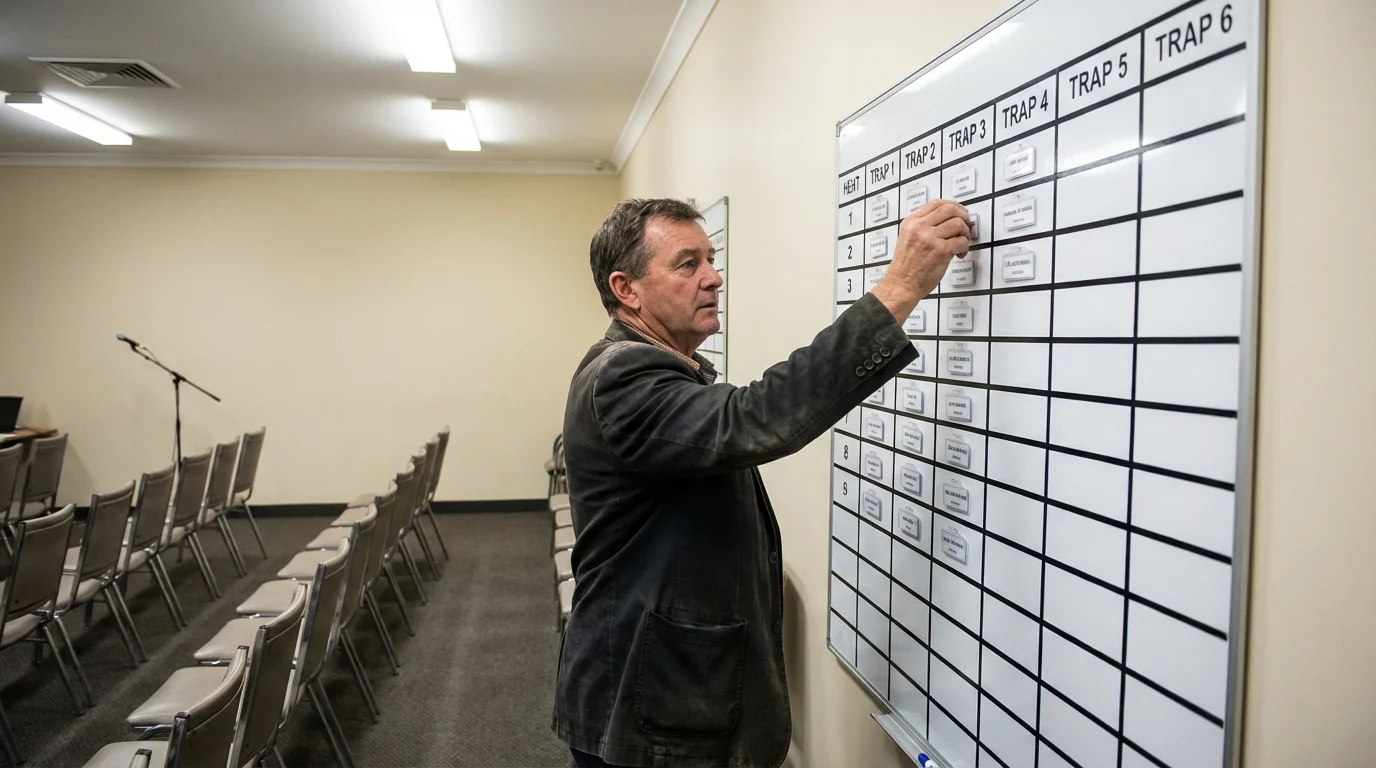
Each round gets its own draw — and the final's draw is an event unto itself. The first-round draw typically takes place at Towcester several days before the opening heats, giving trainers time to assess the composition of their heat and adjust preparation accordingly. For the 2026 Derby, with first-round heats scheduled for late April, the first-round draw will be made public in the days preceding the opening night.
Subsequent round draws follow the same pattern. After each round's results are confirmed and qualifiers identified, the surviving dogs are re-drawn for the next stage. This means a dog that ran from trap 1 in round one might draw trap 5 in round two. The re-draw resets the tactical landscape entirely, and it is one reason why round-by-round form analysis must account for changing trap assignments rather than assuming consistency.
The final draw is a different proposition entirely. With only six dogs remaining and no subsequent rounds to reset the balance, the trap allocation made at this stage carries outsized significance. A dedicated section later in this guide examines the final draw in detail — its format, its market impact and how to analyse it. For now, the key point is this: while the round draws shape each week's betting, the final draw reshapes the entire outright market in a single moment.
Derby Format and Round Structure
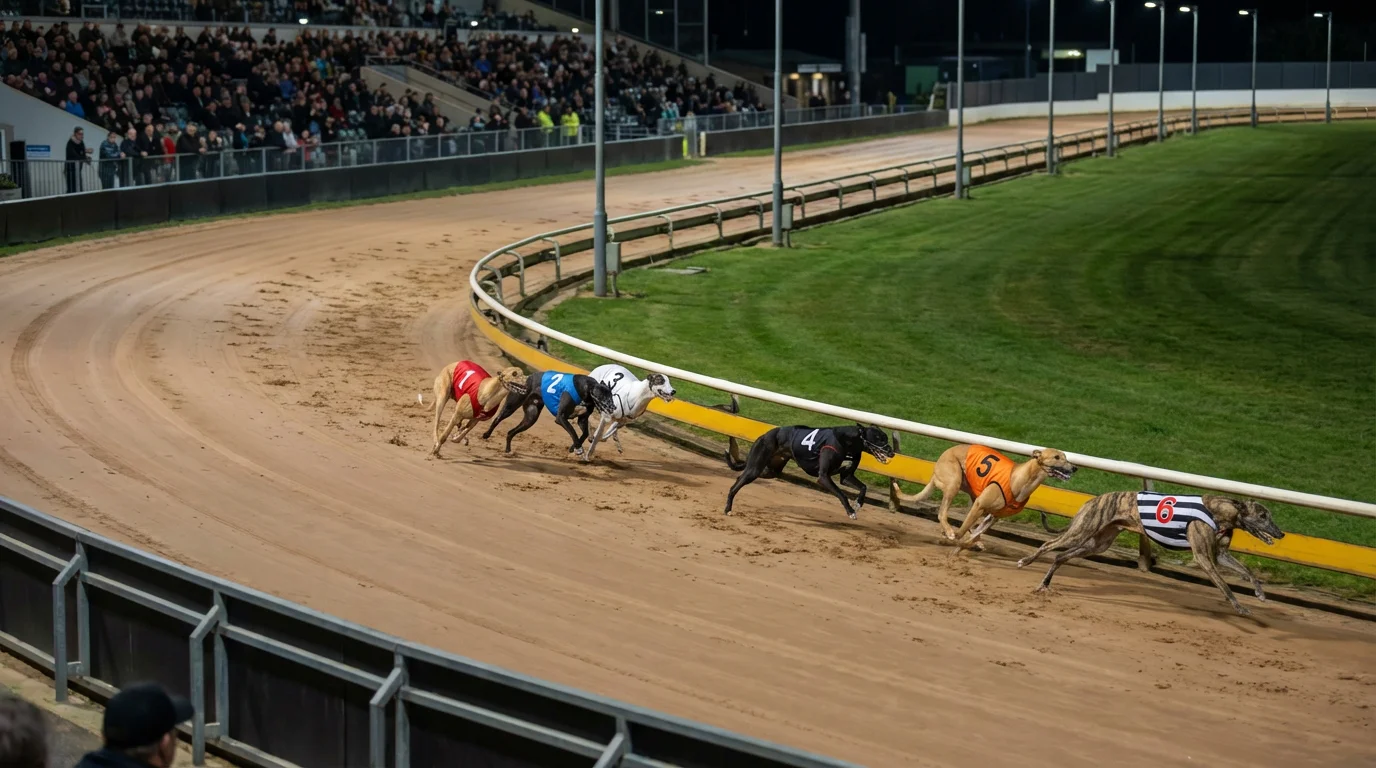
192 dogs enter. Six come out. The English Greyhound Derby operates as a knockout tournament staged over six rounds across approximately six weeks, with each round reducing the field by roughly half. The structure is simple in principle but creates a progressively intensifying competitive environment that shapes both form assessment and betting strategy.
The first round features approximately 32 heats of six dogs each. From every heat, the first three finishers qualify for round two — meaning roughly 96 dogs advance while 96 are eliminated in a single evening of racing. The second round follows the same format: the 96 qualifiers are re-drawn into 16 heats of six, with the first three from each progressing to the third round. In the third round, 48 dogs are re-drawn into eight heats of six, with three from each qualifying. By the quarter-final stage, the field has narrowed to 24 dogs running in four heats. The semi-finals reduce this to 12, split into two heats of six, with the first three from each heat earning a place in the final.
The final is a single six-dog race — the culmination of the entire competition. For the 2026 edition at Towcester, the first-round heats are scheduled to begin in late April, with the final pencilled for early June. Exact dates are confirmed by the GBGB and Towcester closer to the event, and rounds are typically spaced one week apart.
Irish-trained dogs are mixed into the draw alongside UK-trained entries. There is no separate pathway or regional seeding — Irish and UK dogs are classified by the same railer-middle-wide system and drawn into heats together. In recent years, Irish entries have accounted for a significant proportion of finalists, and the integration of these dogs into the draw is seamless from a procedural standpoint.
The progressive elimination creates distinct betting phases. Early rounds feature the largest fields, the widest range of ability and the most generous odds. Later rounds feature battle-tested dogs with multiple rounds of Towcester form data, tighter markets and sharper pricing. The draw is made fresh for every round, so the tactical picture resets each week — and the bettor who reassesses after each draw, rather than assuming continuity, is the one most likely to find value.
Round 1
192 to 96
Round 2
96 to 48
Round 3
48 to 24
Quarter-finals
24 to 12
Semi-finals
12 to 6
Final
6 to 1
Trap Bias in the Greyhound Derby
Trap 1 should dominate. In the Derby, it doesn't. Across more than four decades of Derby finals, the inside box has produced significantly fewer winners than the middle and outside positions — a pattern that contradicts the standard assumption in greyhound racing that inside traps carry a built-in advantage.
The historical numbers tell a striking story. Over the last 40-plus years of English Greyhound Derby finals, Trap 4 leads with approximately 10 victories, followed by Trap 6 with 8 and Trap 3 with 7. Trap 2 accounts for 6 wins. Trap 1 — the position most bettors instinctively favour — has produced only 3 or 4 winners depending on how you count split editions. And Trap 5 went through a drought of more than 15 years without a single winner during the Wimbledon era, a statistic that became its own betting sub-narrative.
These numbers span four different venues — White City, Wimbledon, Nottingham and Towcester — and each venue brought its own track geometry and bias profile. The aggregated data is useful for identifying broad tendencies, but the venue-specific numbers are where the actionable insight lies. At Wimbledon, the tight bends and short run-in amplified the inside advantage in heats but paradoxically disadvantaged trap 1 in the final, where the atmosphere and first-bend dynamics changed under the pressure of the occasion. At Towcester, with its wider bends and longer straights, the outside traps have an even stronger claim.
The Trap 5 drought is worth noting separately. Between 2009 and the closure of Wimbledon in 2017, no dog won the Derby final from Trap 5. The streak extended across venue changes and continued at Nottingham. Statisticians will argue the sample is small and the phenomenon could be random clustering. But 16 years without a winner from any single trap in a six-runner event strains coincidence, and several analysts have attributed it to the awkward position of Trap 5 — too far outside to benefit from the rail, too far inside to get the wide-running room that Trap 6 offers.
Trap 1
Red jacket
3-4 final wins
Underperforms despite inside draw
Trap 2
Blue jacket
6 final wins
Consistent but rarely dominant
Trap 3
White jacket
7 final wins
Strong middle-inside position
Trap 4
Black jacket
10 final wins
The most successful trap in Derby history
Trap 5
Orange jacket
3 final wins
Extended drought across multiple venues
Trap 6
Striped jacket
8 final wins
Wide seeds thrive at Towcester
Why Trap 1 Underperforms in the Derby Final
The inside box is king in graded racing. The Derby final tells a different story. Across standard BAGS meetings, Trap 1 typically wins 19 to 22 percent of six-runner races — well above the expected 16.7 percent if all traps were equal. The geometric advantage is straightforward: the inside dog has the shortest path to the first bend and, if it breaks cleanly, can establish the rail position before any rival challenges.
In the Derby final, that advantage collapses. Several theories attempt to explain why. The most commonly cited is the crowd noise hypothesis: at Wimbledon, where the grandstand was close to the traps, the roar of the crowd on final night was thought to unsettle the inside dog at the break, causing hesitation or a crooked start. At Towcester, where the atmosphere is less intense, this factor should theoretically diminish — but the early data from the Towcester era has not yet shown a decisive shift in Trap 1's favour.
A more structural explanation involves the quality of opposition. In a Derby final, every dog is an elite performer that has won or placed in five consecutive rounds. The front-runners that typically exploit Trap 1's geometric edge are now facing five equally fast breakers. The first bend becomes more contested than in a standard graded race, and Trap 1 loses its positional advantage when the dog in Trap 2 or Trap 3 has comparable early pace. In this context, the middle and outside positions offer more running room and fewer collisions — which is exactly what the historical data reflects.
Towcester Track Geometry and Trap Advantage
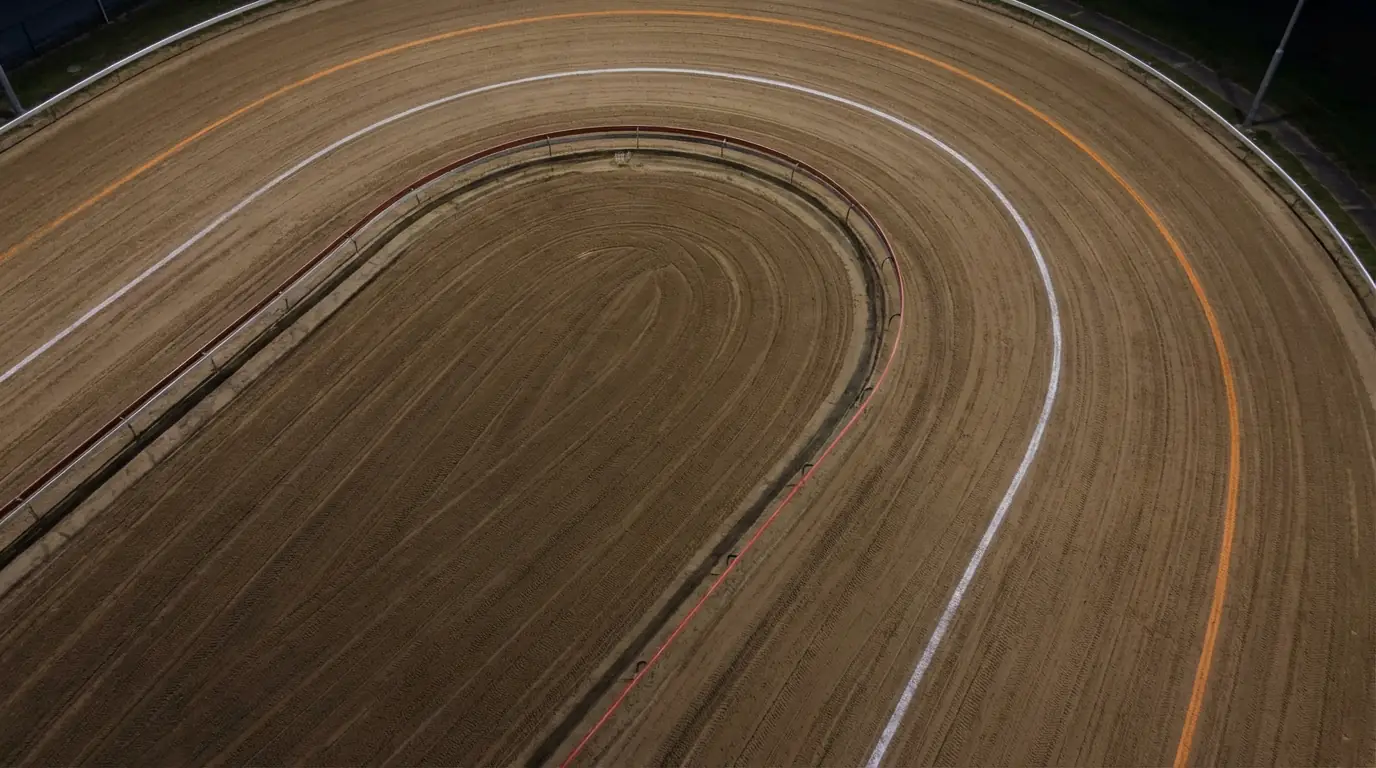
Towcester's first bend rewards wide runners more than any previous Derby venue. The track's 420-metre circuit — with the Derby run over 500 metres — features four bends with a notably longer run from the traps to the first turn compared to Wimbledon's tighter configuration. That extra distance gives outside runners more time to establish their line before the field converges, reducing the crowding penalty that wide seeds typically pay at compact urban tracks.
The bend radius at Towcester is also more generous. Where Wimbledon's bends were tight and punished dogs that ran wide — forcing them to cover significantly more ground — Towcester's sweeping curves allow wide-running dogs to maintain their momentum without the same geometric disadvantage. The sand surface adds another dimension: it provides more grip than the old hare-coursing tracks, and dogs with power through the bends can sustain their pace where weaker runners fade.
For bettors assessing the draw, the practical implication is clear. At Wimbledon, drawing Trap 5 or 6 carried a measurable penalty in most configurations. At Towcester, those same traps can be an advantage — particularly for dogs with proven wide-running form and strong early pace. The track geometry does not eliminate inside advantage entirely, but it narrows the gap between inside and outside positions to a degree that the historical bias data from Wimbledon should be applied with heavy caveats to the current venue.
Betting on the Greyhound Derby Draw
The draw is your first edge — if you know what to do with it. Once the draw for any Derby round is published, the betting market reprices within minutes. Dogs that land favourable traps see their odds shorten; those drawn against type see their prices drift. The window between draw publication and market stabilisation is one of the most exploitable moments in Derby betting, and it rewards punters who have done their preparation in advance.
The starting point is to assess whether the draw aligns with the dog's natural racing line. A confirmed railer drawing Trap 1 or 2 is running from its comfort zone. The same dog drawing Trap 4 faces a tactical problem: it will instinctively seek the rail but must cross the paths of one or two rivals to get there. That crossing risk translates into a quantifiable disadvantage — slower first-bend times, more interference, and a lower probability of establishing a clear run. The ante-post market usually reflects this, but not always immediately or accurately.
Each-way betting becomes particularly relevant after draws are published. A fancied dog that draws unfavourably — a railer in Trap 5, a front-runner boxed between two faster breakers — might drift from a short price to a value each-way proposition. The dog has not changed; its ability is the same as it was before the draw. What has changed is the market's assessment of its probability, and if you believe the market has overreacted to the draw, the value lies in backing the dog at its new, longer price.
Conversely, the draw can confirm a bet you were already considering. A wide seed drawing Trap 6 at Towcester, where the track geometry suits outside runners, is getting exactly the position its form profile demands. If the dog was already on your shortlist based on times and form, the draw is the final piece of evidence that converts interest into a stake.
Bockos Diamond
Trap 6 (wide draw)
11/10 before draw, shortens to 4/5 after draw
Draw suits his racing line — wide seed in the outside box. Ante-post backers confirmed. Neighbour in Trap 5 has a history of drifting wide, creating clear running room on the outside.
How Draw Results Move the Ante-Post Market
Watch the market in the hour after each draw — that is when mis-prices appear. The initial reaction to a draw result tends to be mechanical: bookmakers adjust prices based on a standard model of trap advantage, and the public piles money onto dogs that drew well. But the standard model does not account for individual matchups within a heat, and it is in those matchups that the real value hides.
Consider two dogs drawn next to each other. Dog A is a confirmed railer in Trap 1 with sharp early pace. Dog B, in Trap 2, is also a railer but with a slightly slower break. The standard model says Trap 1 is favourable. The matchup analysis says Dog A will establish the rail cleanly because Dog B cannot match its break speed, making Trap 1 even more advantageous than the model assumes. If the market prices both dogs as though Trap 2 is a neutral draw for a railer, Dog A is underpriced.
The reverse also applies. Two fast breakers drawn in Traps 1 and 2 will contest the rail aggressively, potentially compromising both. A closer drawn in Trap 4 or 5, behind the first-bend scrimmage, might benefit from the chaos. The market often prices the two fast breakers too short and the closer too long in this scenario. Identifying these patterns within 30 to 60 minutes of the draw is where preparation meets opportunity.
Reading the Draw: Practical Analysis Framework
Don't just check which trap your dog drew. Check who's next to it. A trap number in isolation tells you almost nothing useful. Trap 3 is neither good nor bad until you know what is in Traps 2 and 4, what the early-pace profile of the heat looks like, and whether the dog drawn there has a history of running well from that position. The draw is a puzzle, and each piece only makes sense in relation to the others.
A practical framework for evaluating any Derby draw starts with five questions, applied in sequence. First: does the trap match the dog's seeding classification? A railer in Trap 1 or 2 is in its natural environment. A railer in Trap 4 has been displaced, and you need to assess whether it has the tactical flexibility to adapt. Second: what is the crowding risk? Look at the dogs drawn immediately inside and outside your selection. If both are confirmed railers with fast early pace, a dog drawn between them faces traffic into the first bend. If one neighbour is a wide seed that will naturally drift away, the crowding risk drops.
Third: compare the early-pace profiles of all six dogs in the heat. Which dogs are likely to lead into the first bend? Which will settle behind? A heat with three fast breakers on the inside and three closers on the outside produces a specific first-bend dynamic — one where the closers may find clear running room while the front-runners scrimmage. Fourth: review the dog's historical performance from the drawn trap or a similar position. Some dogs are versatile and perform consistently from any trap. Others are trap-dependent, showing markedly better form from their preferred position. This data is available from racing databases and racecards.
Fifth: assess the clear-run probability. A dog with early pace drawn in Trap 1 with a slower breaker in Trap 2 has a high probability of leading to the first bend unchallenged. A dog drawn in Trap 3 between two fast breakers has a lower clear-run probability and may need to check or alter its line. This final assessment is the synthesis of the previous four, and it is the number that should inform your betting decision more than the trap number alone.
Draw analysis checklist
- Check seeding alignment — does the trap match the dog's natural racing line?
- Identify crowding risk from neighbours in adjacent traps.
- Compare early-pace profiles of all six dogs in the heat.
- Review the dog's historical form from this trap position or similar.
- Assess clear-run probability based on the combined picture.
The Final Draw: How Six Become the Story
Six dogs. Six traps. One draw that rewrites the betting. The final draw is the single most consequential moment in the Derby calendar outside the race itself. With only six dogs remaining after five rounds of elimination, every trap assignment carries amplified significance — there are no surplus heats, no second chances, and no opportunity for the draw to average out over multiple races.
The final draw is traditionally made at a sponsors' event — historically the Derby Lunch — in the days before the final itself. The draw is attended by connections, media and bookmaker representatives, and it is typically broadcast live on Star Sports and streamed by several bookmakers. The format is straightforward: six balls representing traps 1 through 6 are drawn alongside the names of the six finalists, assigning each dog its starting position. But the simplicity of the process belies the magnitude of its impact.
In the ante-post market, the final draw produces the sharpest single price movement of the entire tournament. A dog that was 3/1 before the draw might shorten to 2/1 or drift to 5/1 depending on its trap allocation and the composition of the field around it. The 2025 final illustrates the dynamics: when the draw was made for that year's final at Towcester, Droopys Plunge — trained by Patrick Janssens — drew Trap 1. For a dog with sharp early pace, the inside box at Towcester was a workable proposition, and the market adjusted accordingly.
The 2024 final provides another instructive example. Liam Dowling's De Lahdedah drew Trap 4 — the most statistically successful position in Derby final history. The draw aligned with the dog's racing style and the market responded by shortening its price. De Lahdedah went on to win the final, adding another tally to Trap 4's record.
Why does the final draw matter more at Towcester than it did at Wimbledon? The answer lies in the track geometry. Towcester's wider bends and longer run to the first turn mean that the relative advantage of different trap positions is less extreme than at Wimbledon, but the matchup dynamics within a six-dog field are more complex. At Wimbledon, Trap 1 was often a clear advantage in heats but a liability in finals. At Towcester, the trap advantage is more nuanced and more dependent on individual matchups — which means the final draw carries informational value that goes beyond simple positional bias.

2025 Final Draw — Worked Example
Droopys Plunge draws Trap 1 in the final at Towcester.
Racing line: early-pace railer with proven first-bend speed.
Neighbour in Trap 2: a middle tracker with moderate break speed, unlikely to contest the rail aggressively.
Assessment: Trap 1 suits the dog's running style. Low crowding risk from Trap 2 neighbour. Clear-run probability to first bend is high.
Market reaction: price shortens from 3/1 to 9/4 within 30 minutes of the draw.
Outcome: Droopys Plunge wins the 2025 English Greyhound Derby.
Draw Strategy by Round
Round 1 draws reward different things than a semi-final draw. The tactical significance of the draw evolves as the Derby progresses, and the bettor who applies the same analytical framework to every round is missing the point. Each stage of the competition has its own draw dynamics, and recognising those dynamics is what separates a systematic approach from a reactive one.
In the first round, the priority is identifying dogs that can avoid trouble. With 32 heats and many dogs running at Towcester for the first time in competition, the early rounds are chaotic. Fast breakers drawn on the inside have a natural advantage because they can establish position before the field bunches. But the first round also produces value on the outside: wide seeds drawn in Trap 6, running against a mixed field that includes unproven entries, often get a clean run on the outside while the inside runners scrimmage. Look for wide seeds in round one heats where the inside is loaded with multiple fast breakers.
Round two and the quarter-finals introduce tougher heats. The dogs that survived round one are proven Towcester performers, and the ability gaps narrow. In these middle rounds, the draw becomes less about avoiding trouble and more about maximising each dog's strengths. Inside runners need a clean break and an uncontested rail. Middle trackers need to avoid being squeezed between aggressive neighbours. The draw analysis at this stage should focus on individual matchups within each heat rather than broad positional advantage.
The semi-finals and final are where the draw has the greatest impact on betting. With only 12 dogs left at the semi-final stage and six in the final, each trap assignment is a significant variable. At this stage, every dog is an elite performer. The margins between them are measured in fractions of a length, and a draw that gives one runner a clear first bend while another faces traffic can be the decisive factor. Semi-final draws also carry forward implications: a dog that qualifies from a favourable draw has demonstrated less under pressure than one that qualified despite a difficult draw. The dog that won from Trap 6 against two fast inside runners has shown more resilience than the one that led unchallenged from Trap 1.
DO
- Reassess after every draw — do not carry assumptions from one round to the next.
- Factor in track conditions alongside trap position when evaluating draws.
- Look for first-round losers who drew badly but showed ability — they may draw better next time.
DON'T
- Assume unbeaten dogs will stay unbeaten regardless of draw.
- Back short-priced favourites from Trap 1 in the final purely because of inside position.
- Ignore wide seeds at Towcester — the track geometry favours them more than any previous venue.
Key Greyhound Derby Draw Statistics
Numbers don't lie — and these have decades of Derby finals behind them. The following table summarises trap performance across the modern era of the English Greyhound Derby, covering finals from the 1980s to the present day. These figures span four venues — White City, Wimbledon, Nottingham and Towcester — and should be read with that context in mind.
| Trap | Final wins (approx.) | Win rate | Notable trend |
|---|---|---|---|
| 1 (Red) | 3-4 | ~9% | Underperforms vs graded racing average |
| 2 (Blue) | 6 | ~15% | Consistent but rarely dominant |
| 3 (White) | 7 | ~17% | Strong inside-middle position |
| 4 (Black) | 10 | ~24% | Most successful Derby final trap |
| 5 (Orange) | 3 | ~7% | Extended drought across multiple eras |
| 6 (Striped) | 8 | ~20% | Wide seeds benefit from outside position |
The Towcester-era data is a smaller sample — the venue has hosted the Derby since 2017 with a break in 2019 and 2020 when the event moved to Nottingham — and should be weighted carefully against the larger historical dataset. Early evidence from Towcester suggests that the outside traps, particularly Trap 6, continue to perform well in finals, consistent with the track's geometry favouring wide runners. Trap 4's dominance appears to hold across venues, which supports the theory that the middle-outside position offers the best combination of running room and first-bend access regardless of track configuration.
Heat-level statistics tell a slightly different story. In first-round heats, where the field is larger and ability gaps wider, inside traps perform closer to their graded-racing averages. Trap 1 wins approximately 18 to 20 percent of first-round Derby heats — a figure more in line with standard six-runner racing. The bias towards outside traps becomes more pronounced in later rounds, particularly from the semi-finals onward, when the remaining dogs are closer in ability and the first bend becomes more fiercely contested.
Semi-final qualification rates by trap show a more even distribution than the final winner data, which makes sense: finishing in the first three from any trap is less dependent on positional advantage than winning outright. The draw matters most when separating the winner from the placed dogs — which is exactly the betting decision that matters most in the outright and forecast markets.
Important
Trap statistics shift with venue changes. Towcester data from 2017 to the present represents a small sample compared to the Wimbledon era. Always weight recent trends alongside historical records, and remember that individual form, running style and heat composition matter more than aggregate trap bias for any single race.
Greyhound Derby Draw: Frequently Asked Questions
How does the greyhound derby draw work?
The English Greyhound Derby draw is a seeded allocation system, not a random lottery. Every entered dog is classified by its natural racing line: railer (inside runner), middle tracker or wide seed. The draw is then conducted in three stages under GBGB Rule 80. First, railers are drawn into heats and assigned the lowest available trap numbers (traps 1 and 2). Next, middle-seeded dogs are drawn into traps 3 and 4. Finally, wide seeds fill traps 5 and 6. Each round of the Derby gets its own fresh draw, and the final draw is held as a separate public event. The system aims to place every dog in a trap that suits its running style, though imbalances in the number of dogs in each category mean that some runners are occasionally displaced from their ideal position.
What trap has won the most greyhound derbies?
Trap 4 (the black jacket) has produced the most English Greyhound Derby final winners, with approximately 10 victories over the past four decades. This gives Trap 4 a win rate of roughly 24 percent — significantly above the expected 16.7 percent for a six-trap race. The success of the middle-outside position is attributed to its combination of running room and first-bend access: Trap 4 is close enough to the inside to contest the racing line but far enough outside to avoid the scrimmaging that often affects traps 1 and 2 in high-quality finals. Trap 6 (striped jacket) ranks second with approximately 8 wins, benefiting from the outside position at venues with generous bends.
Does trap position matter in greyhound racing?
Yes, trap position has a measurable effect on greyhound race outcomes. In standard six-runner graded racing, inside traps (particularly Trap 1) have a statistical advantage because the dog has the shortest path to the first bend and the racing line on the rail. However, in the Greyhound Derby final, this pattern reverses: Trap 1 has historically underperformed while middle and outside traps — especially Trap 4 and Trap 6 — have produced more winners. The explanation involves the intensity of competition in finals, the quality of rivals and track geometry at Towcester, where wider bends reduce the geometric penalty of outside starting positions. For bettors, trap position should be treated as one variable among several, factored alongside form, running style and heat composition rather than used in isolation.
After the Traps Spring: Why the Draw Never Tells the Whole Story
The draw loads the gun. The dog pulls the trigger. After everything in this guide — the seeding mechanics, the bias statistics, the round-by-round strategy, the worked examples — the essential truth remains: the draw is the most analysable, most data-rich variable in the entire Derby, and it is still only one variable.
The best dog from the worst trap wins more often than the worst dog from the best trap. That sentence is worth remembering every time you are tempted to dismiss a selection because of its draw or to back one solely because of a favourable trap assignment. Draw analysis is a filter, not a verdict. It sharpens your assessment. It should never replace it.
What makes the draw particularly valuable for bettors is its timing. It arrives after entries are confirmed, after seedings are published, after the ante-post market has priced the field — and it introduces new information that the market must absorb quickly. The bettor who has already done the form analysis, who already knows which dogs are railers and which are wides, who already understands how Towcester's bends favour outside runners, is the one best positioned to act on the draw when it drops. Everyone else is reacting. You are confirming.
As Towcester's sample size grows — more finals, more heats, more data points — the picture of its specific trap bias will sharpen. The patterns visible in the Wimbledon era may or may not replicate at the current venue. The early data suggests that the outside traps carry even more value at Towcester than they did at Wimbledon, and that the Trap 4 dominance is venue-agnostic. But these are early observations, not settled conclusions. The 2026 Derby will add another data point to a dataset that is still being written — and the punter who treats that data with appropriate rigour, rather than false certainty, will be the one who finds value when the traps spring open.